Our NetSuite tips are designed to help you get the most out of using NetSuite. This month’s guide is all about sending emails directly from records.
Sending your emails directly from NetSuite allows you to track all communication between you and those you do business with. Whether through email, letters or over the phone, all of the information you need can be planned and executed through NetSuite.
Sending emails from NetSuite
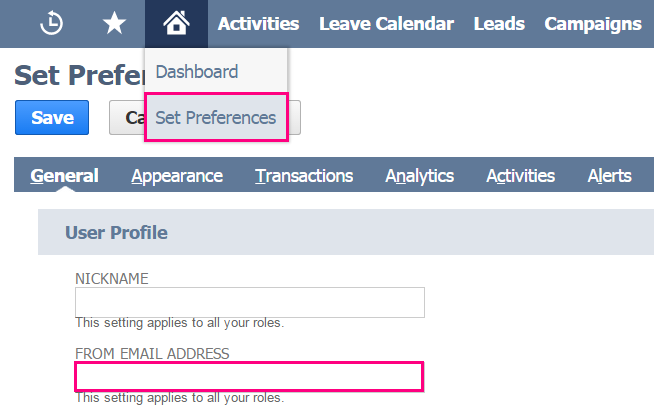
Emails sent from NetSuite use one of the following as the From address:
- The email address set in the From Email Address field at Home > Set Preferences > General under User Profile, or
- If there is no from email address entered on the Set Preferences page, the employee’s login email address
If contacts for your customers, vendors or partners reply to the email you send from NetSuite, that reply is both sent to the email address you log in with and automatically saved to the Messages subtab of the contact record as well as the customer, vendor or partner’s record (in the Communications subtab).
Which NetSuite records can you send emails from?
Email messages you send from NetSuite records are saved in the Communication subtab for each individual contact receiving the message as well as on the record you send the email from.
You can choose to email a contact from the following types of records:
- Contact
- Customer
- Lead
- Prospect
- Vendor
- Company
- Other Name
- Partner
- Opportunity
- Transactions
Here’s how to send emails from a record
1. On the record you want to send an email message from, click the Communication subtab.
2. On the Messages subtab, do one of the following:
- If you are replying to or forwarding an email message, click View next to the email message:

- And then click Reply, Reply to All, or Forward:
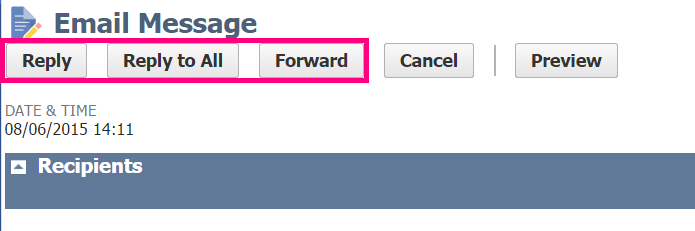
(If you are replying, attachments are not included by default and can be added on the Attachments subtab. Forwarded messages include attachments by default.)
- If you are sending a new email message, click Email. Alternatively you can use the ‘create new’ button at the top of the record, and select email from the dropdown list:
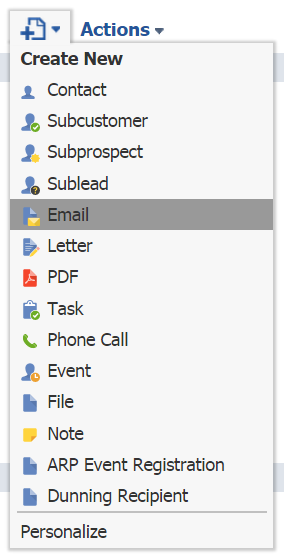
An email message box will pop up.
3. In the Recipients section:
- Select the contact you want to email in the Recipient field, or enter an email address.
- In the Copy Others column, select others you want to include in this message.
- In the Email field, enter an email address if one does not exist.
- Tick the Cc box to copy this contact, or tick the Bcc box to blind copy the contact.
- Click Add for each contact you want to copy in.
4. In the Message section:
- To use an email template in this message, select a category to filter the list of templates to show only those in this category. (This field is only available if you have enabled the CRM Template Categories feature.)
- Select a template you have uploaded to NetSuite. Tick the Update box to update your template with any edits you make in the Message field.
For more information on creating email templates, search “Creating New Email Templates” in the help centre.
- In the Subject field, enter a subject for this message.
- Tick the Request Read Receipt box to request read receipts from individual recipients.
- Choose the template format you want to use for this message (scriptable is recommended because CRMSDK may be deprecated in the future).
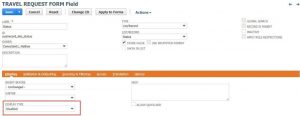
- If you want to add field tags in your message, use the Field Type field and the Insert Field (these allow you to automatically insert information in the email body such as the recipient’s first name or the name of their sales rep).
- In the Message field, enter your email message. Style and format as required.
- If you selected a template file, you can edit the message in this field.
5. In the Attachments section
- Tick the Zip Attachments box to compress the files you are sending.
- If you want to attach a Word document template to the email message, select the letter template you want to use in the Attach Document Template dropdown. (Search “Creating a Letter Template Record” in the help centre).
- To attach a statement to this message, tick the Include Statement box, and select the date of the statement.
- In the Start Date field, you have the option of entering the date of the oldest transaction you want to appear on the statement.
- In the Type field, you can select the type of statement to attach.
- You can enable the Show Only Open Transactions option to include only open transactions in the attached statement. Note: If you enable this option and do not enter a start date, the statement includes all open transactions in the customer’s history.
- In the Attach File column, select the file from your file cabinet you want to attach to this message. Or click the plus sign to upload a new file from your computer. (Email attachments must be 5MB or smaller.)
- Click Add after each attachment you want to add.
6. Click Send, or if you use the Mail Merge feature, click Merge & Send.
Note:
Email messages cannot exceed 25,000,000 bytes (~23.8 MB) in size. This includes the size of the message itself and all attachments.
If you use NetSuite’s UK Edition, to comply with UK law, your business address and VAT number are included in the footer of all emails you send to those outside of your company.
Tip: Click View History (in the Communication subtab) to easily scroll through all messages sent to and from contacts.
Working with files attached to email messages
Files attached from your computer to emails you send from within NetSuite are stored by default in the Attachments to Send and the Attachments Received folders in the file cabinet. These folders are also used when you attach messages you receive outside of NetSuite to a record.
The attachment folders are system-generated folders in the file cabinet only used to hold these files, so files in these attachment folders are not available to select as attachments when sending emails.
If you want to attach a file from one of these folders to an email message, you must move the file to another folder prior to sending the email message.
Requesting read receipts
Read receipts can set your mind at ease that recipients have received a message, which is important when sending important information or time-sensitive transactions. With NetSuite, you can include read receipts on all outgoing email messages to individual recipients.
All received read receipts are forwarded to the original sender of the message and tracked on the message record in NetSuite, providing an audit trail within the application. You can view the status of read receipts on the Read Receipts subtab of a message record.
The status may contain either of the following values:
- Confirmed — The message was displayed to someone reading the recipient’s mailbox. (However, there is no guarantee that the content has been read or understood.)
- Message Deleted — The message was deleted without reading. There is no guarantee that the recipient has seen the message
It’s important to note that when you tick the Request Read Receipt box on an email message, the email client of the recipient receives a read receipt request. Email clients handle read receipt requests in various ways. Depending on the configuration of the recipient’s email client, the recipient can decide whether or not to respond to the read receipt request when the message is viewed.
I hope this has been a helpful walkthrough for sending emails from NetSuite. If you would like to find out more about how NetSuite works, please don’t hesitate to get in touch with our team of experts or view our other guides below.
Feel free to share this guide with your colleagues or comment below.